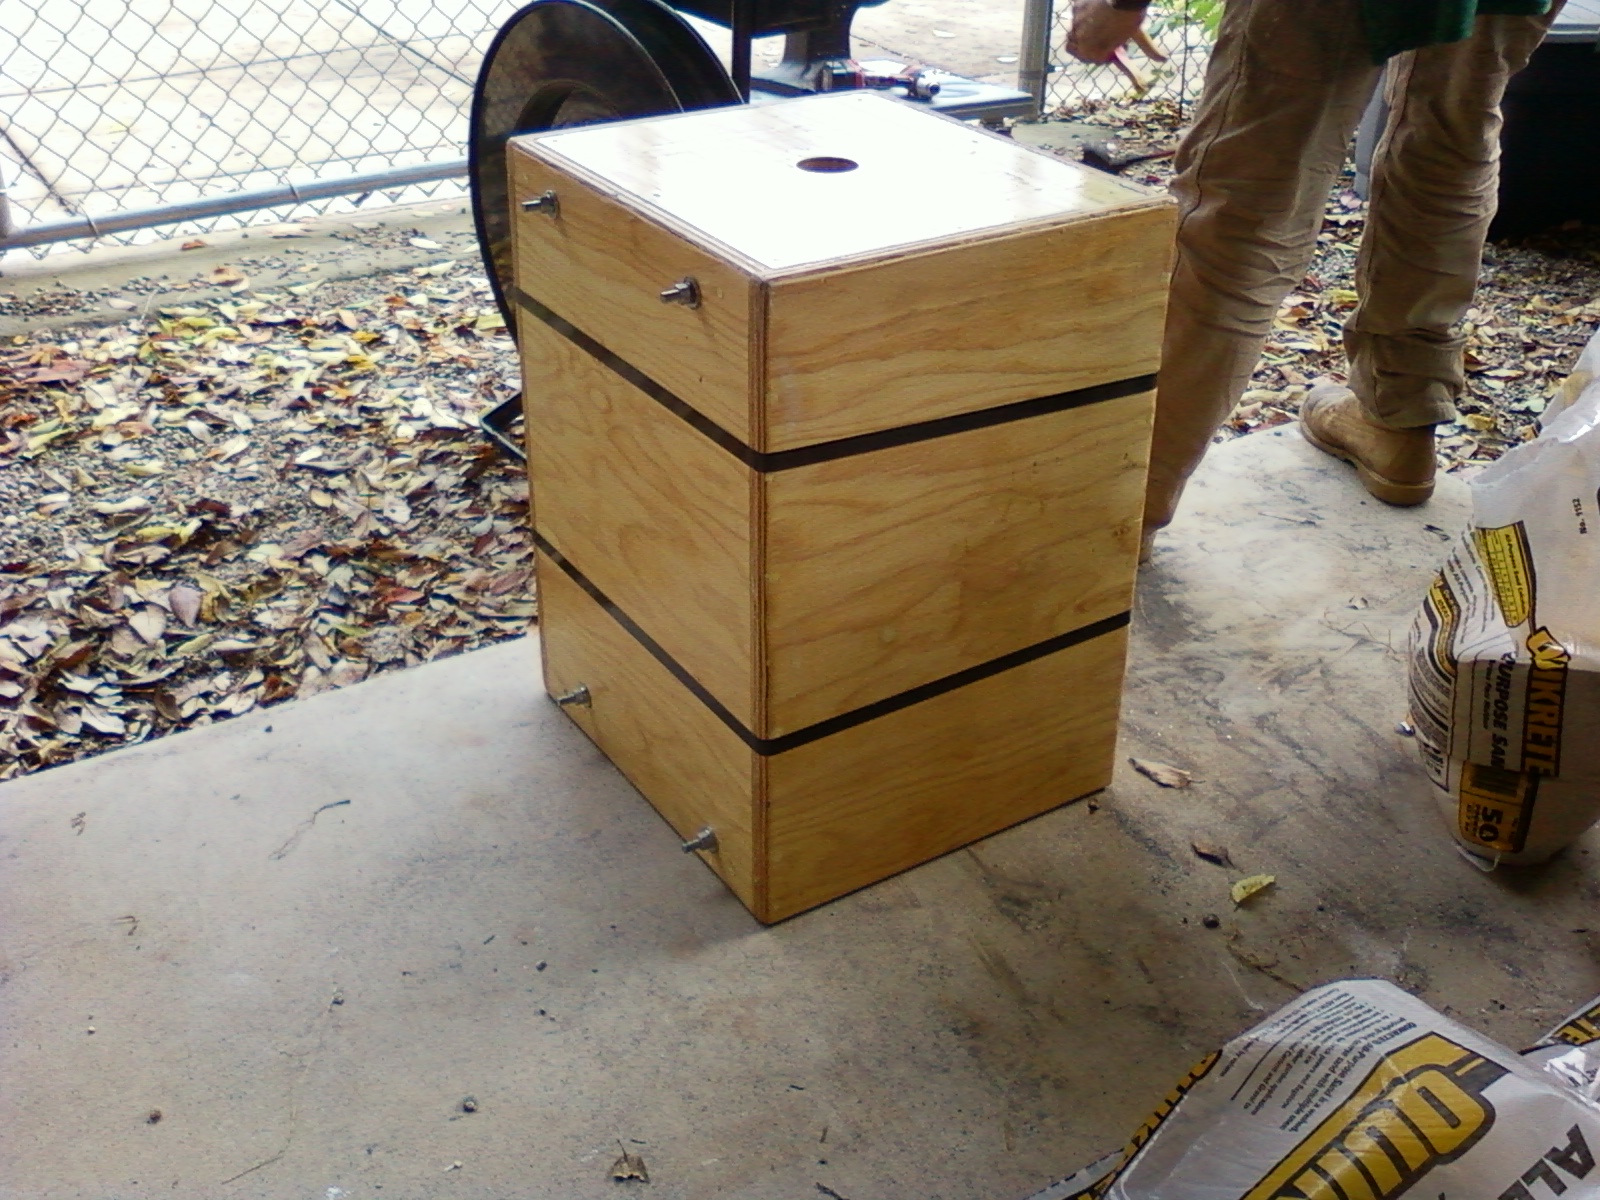
This is the base mostly assembled. We glued up two blocks of poplar for the lid and base. We then drilled a hole in the top to allow for air flow and to add sand. We through bolted two threaded rods in the top and bottom to hold the lid and base in place. The walls are made out of 3/4" marine grade plywood to help stand up to the elements since the base lives outdoors. The base was assembled with wood glue and screws. The inside was then painted to seal it and the seams were caulked with silicone caulk to keep out moisture. The screw holes were puttied over and the flaws in the plywood were also puttied over.


Things I would have done differently. I would have planned the bracket and through bolt placement out a little better, since they are pretty close to each other right now. After some abuse the through bolts are also taking a bit of a beating and the lid is starting to sink. Other than that it's holding up pretty well so far.
Again, tell us what we're seeing and why it's important. You have so many photos that I recommend:
ReplyDelete1. A descriptive title for each photo;
2. A brief explanation of what each step represents;
3. An assessment of what worked in each process, what you'd do differently, etc.